Wednesday, June 20, 2018

Making Ink 
Gum Arabic


I'm sure most of you are familiar with gum arabic. It's tree sap from a shrubby tree: Acacia senegal, although it was probably collected from Vachellia Nilotica (Acacia nilotica) and other species of acacia in the middle ages.

Image result for gum arabic tree
Native to Egypt.

The tree sap is collected as dried crystals.

Image result for gum arabic tree
Dried sap around a cut in the tree bark.

You can purchase it as crystals, powder, and in liquid form already dissolved in water.

Gum arabic helps to thicken the ink a bit & makes it flow through a pen more easily. You need a proper consistency for the ink to prevent it from blobbing and feathering out around the edges every time you touch your pen to the paper. 


Tuesday, June 19, 2018

Next Ingredient:
Copperas
or Iron Sulfate

Image result for ferrous sulfate
Ferrous Sulfate crystals
(Green) Copperas and Green Vitriol are the medieval names for Iron(II) Sulfate (FeSO4 x H2O) used in making Iron Gall Ink.

In the middle ages, copper sulfate was known as 'blue copperas' while zinc sulfate was known as 'white copperas.'

Kremer Pigments carries it, although I'm sure you can also purchase it from numerous suppliers as it has many modern uses. https://shop.kremerpigments.com/en/search?sSearch=ferrous+sulfate

Iron sulfate is what turns ink black when it reacts with tannic acid (extracted from oak galls) and oxygen from the air. Iron sulfate is fairly acidic though, and if you add too much to your ink, it can become corrosive and eat right through your paper or vellum over time.

Image result for corroded manuscripts ink
An example of ink eating through writing paper after many years.
It's also a very good idea to rinse your metal pen nibs after using them with this ink to prevent them rusting & corroding too! I suppose you could buy some Ph test strips - to see how acidic the ink is once it's finished. I'll have to see if I have any test strips & give that a try.

Once you write with this ink, it will turn darker on the page as it's exposed to oxygen in the atmosphere while it dries. 


Monday, June 18, 2018

I'm down to 2 last bottles of handmade iron gall ink. 
Time to make a new batch of ink! 

If you kids want to follow along, https://irongallink.org/ has TONS of information on ink & recipes.
Ian's blog also has lots of info along with his personal experiences in ink-making:
https://scribescribbling.wordpress.com/

Not sure which recipe I want to try yet, but I'm collecting the materials needed. The first ingredient is
Oak Galls

An oak gall is a growth on an oak tree caused by insect damage. Tannic acid is concentrated in these galls and is the first basic ingredient in this type of ink. 

Aleppo oaks (Quercus infectoria) are supposed to produce the best ink - having a larger amount of tannic acid in the galls than other oaks. Galls from this species of oak are caused by wasps laying eggs in the tree. The resulting galls have been used in ink-making for centuries. 

Image result for Quercus infectoria
Aleppo oak tree - native to Greece & can be found in parts of southern Europe.
If you look closely at oaks in your area, you may also see lumps or round growths caused by similar insect damage. Several years ago, I made a small batch of ink from oak galls collected in Missouri. It was a good solid black ink, so feel free to experiment. (You may want to check with the owner of the oak tree(s) before you harvest galls. Might be a little embarrassing to be charged with trespass or property damage in your quest for ink.) I have no idea how to measure the amount of tannic acid in a given batch of oak galls. You might have to adjust your recipe if you're using galls from another species of oak.

SOURCES FOR OAK GALLS
Kremer Pigment sells aleppo oak galls: http://shop.kremerpigments.com/en/
Ancient Earth Pigments also sells them: https://www.ancientearthpigments.com/product/aleppo-gallnuts/

Yay! Oak galls.

Friday, January 27, 2017

Embroidered Edging


Embroidered edging.
Doing some embroidery on a linen gown.
This is the sleeve edge. Heavy gold silk and fine sewing weight green silk. Straight stitch next to the edge then a band of stem stitch outlining a line of long-arm cross stitch. Obviously, I'm not county thread on the cross stitch like I should be. It's the firs time I've tried this particular stitch, so it looks uneven and messy. Probably will improve as I practice on the rest of the garment. (I could tear it out & try again, but too lazy.)


I originally pinned a piece of 1/8 inch ribbon to the edge of the sleeve to measure the width between the rows of stem stitch. Unpinned the ribbon & worked the long arm cross stitch between the stem stitching.


This is one of my tatting shuttles & a circular motif I've tatted in heavy gold silk. I tatted a bunch of them in the same size.

Here you can see how the tatting is appliqued in a row around the neckline. You can see the centers of the tatted motifs have not yet been stitched in place. More stem stitch circles in green and gold outlining the tatting,  

I'm outlining the area where I want to do couched & laid work. A single strand of green silk thread marks the area. I just eye-balled the triangular shapes. 


You can see the area filled in & outlined with more gold stem stitch. I've also added glass beads in the centers of the tatting..

Closer view. You can get a little better look at the couched & laid work. This patch is pretty much finished. 

Monday, February 22, 2016

Some sketches from the journal I kept on our Alaska trip in 2013


Add caption


Just a doodle to keep my occupied

Some random leaf shapes from Alaska

Saw this weird plant somewhere in California.

Sunset on the road. I loved the plum & rose colors.

Friday, February 19, 2016

I've been making some new stuff & getting ready for Gulf Wars in March. Looking forward to warm weather & green grass in Lumberton, MS! I've crushed up some Aleppo oak galls & will be making a batch of ink for sale as well...


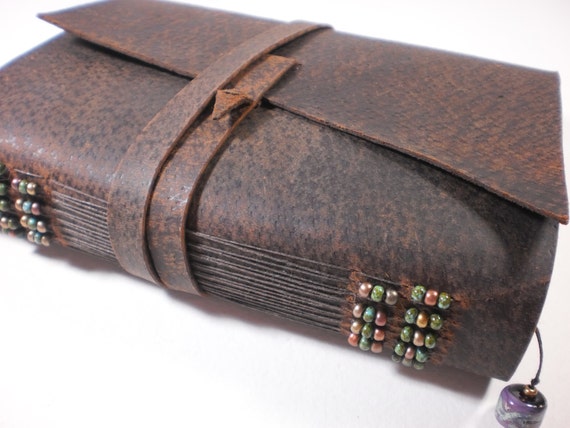
Been playing with 'distressed' pigskin. Gives this journal a rustic look. I may have to make one for myself & fill it with sketches. 

Wednesday, February 17, 2016

http://www.winsornewton.com/uk/discover/tips-and-techniques/oil-colour/understanding-oil-painting-rules
From the Windsor & Newton web site:
Fat Over Lean
Each successive layer needs to be more flexible than the one underneath. This can be done by adding more medium to each successive layer, which makes each new layer more flexible than the previous one and stops the painting from cracking. Think of the rule as ‘Flexible over Non-Flexible.’
Winsor & Newton has a range of mediums to help create this flexibility within layers. One of the most commonly used mediums is Liquin Original and by using it, there is no need to keep on adding oil to your colour.

Thick Over Thin
When painting with heavy colour, it is best to apply thick layers over thin layers, this is because the thin layers dry quicker. For example if you like the impasto style of the Impressionists with their thick bold brush strokes then it is important to remember that these thick layers need to be upper most – thin layers on top of impasto layers are likely to crack.

Slow Drying Over Fast Drying
It is best to use fast drying colours continuously as under layers. If a fast drying layer is applied on top of a slow drying layer then your painting may crack. This is because the fast drying layers will have dried on top of layers that are still in the process of drying out, and as the slow drying layers dry, they will pull and twist those (fast drying) layers above causing them to crack.